Much to their own chagrin, hardware stores hadn’t been invented yet in the Neolithic age. And so, these ‘simple people’ – as we patronizingly call them – were forced to make their own tools. Which they did with a creativity and skill we can still learn from.
Today, in this age of plenty, artists and sculptors, still turn to custom sculpting equipment. Even though stores are filled to the brim with stuff to buy, there are several reason to want to make our own stuff. Most common reason is that what we need isn’t for sale, or not in the size that we need. Sometimes, the equipment is available, but it is quite expensive. Making it yourself is the budget-friendly alternative.
There are metal frames for armatures – called back-irons – that you can buy. But with a few plumbing pipe materials, you can easily make them yourself. A topic for a future blog. And then there are loop tools and scrapers. Today’s topic. They are easily made. And you can create them in a wide variety of sizes and shapes. Here’s how you do it:
What We Need To Make Our Own Tools
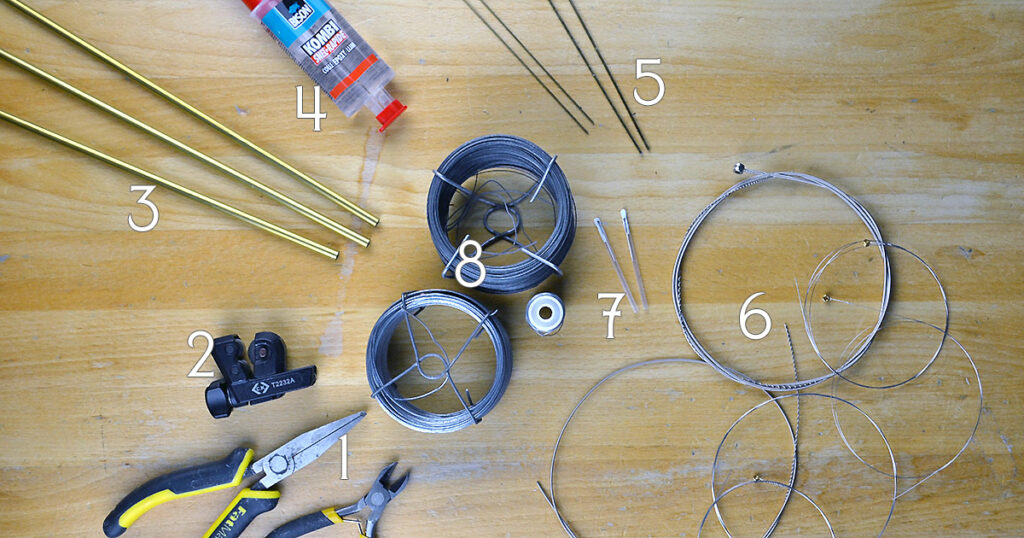
First things first, we need a couple of materials and tools to get started. In the picture above I’ve shown you the bare minimum of equipment you are going to need. I’ve also given you a few examples of materials you could use to create your loop tools and scrapers with. Let’s see what we have here.
- At the bare minimum you’re going to need a side cutter and a flat nose plier. To make life easier for yourself, I do recommend investing in either a round nose plier, or a needle nose plier (or both!), because they will help tremendously in shaping your loops and scraper ends. Since these are pliers that you’ll be using to make your armatures anyway, this is not a frivolous investment.
- A simple tube cutter. You won’t need anything fancy for this, since the tubes we use are thin and easy to work with. The type shown here works just fine.
- Brass tubing. Needed to create the handle! I personally use tubes with a diameter of either 6mm or 4mm, but keep in mind that my work is small and extremely detailed. (hence my need for custom sculpting tools) You will have to look at your own requirements to see what size you’re going to need. The ends will hold the loops and scrapers, so as long as they will fit inside, you’ve got the right size.
- The glue I’m using to keep everything together is a universal 2-component epoxy glue. It’s fast setting, it’s strong, and since it’s a universal glue it’ll glue metal, stone, wood, paper etcetera.
So, those are the tools needed. Now let’s take a look at what type of materials you can think of to make either scrapers, or loop tools.
- 5. It’s hard to see in this picture, but these are square brass rods, size 1mm and 2mm. (again, because I need small tools). These work great as scrapers. The hard edges give a really nice texture.
- 6. Guitar- and violin metal string. You can use the coiled string for scrapers, whereas the plain ones are perfect for strong loop tools. There’s a wide variety of gauges to choose from.
- 7. If you’re like me and you love to torture yourself with detail you can barely see, take a look at accupuncture needles! They leave very crisp lines. The downside to these as tools is that they are quite vulnerable. They are about the side of a hair, after all. So you’ll have to replace your tool fairly often. Oh, the things we do in the name of art!
- 8. And of course, utility wire. Again: Different gauges and materials give lots of room to experiment. You can twist them, so you could use the wire as a scraper, or leave it au naturelle for a lovely loop tool.
There are of course more options that I haven’t listed here. People have used tiny saw blades. Although quite brittle and prone to breakage, when heated with a heat gun, the metal will soften and you’re able to bend the blade. Have fun and experiment!
Custom Shapes
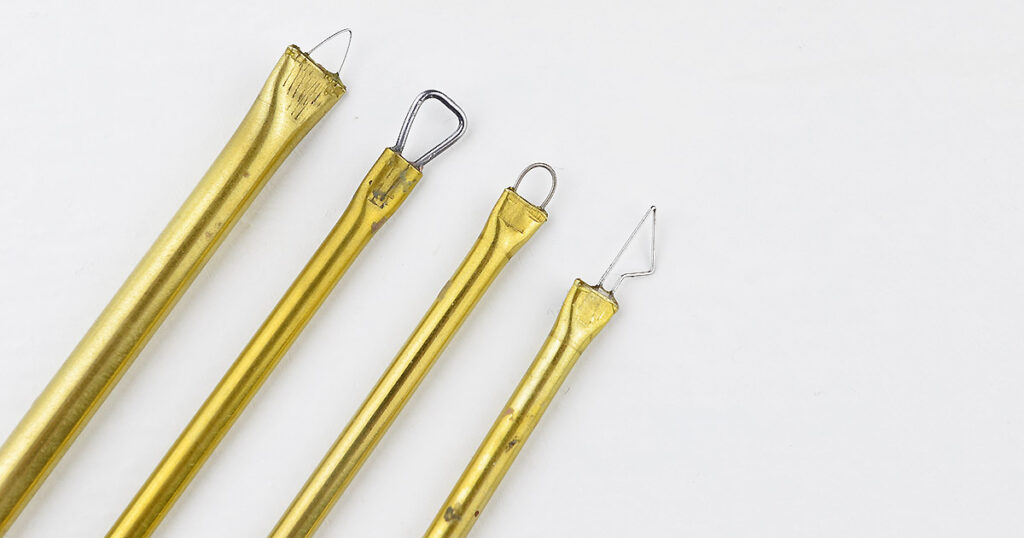
Just like store-bought loop tools, our custom sculpting tools come in a variety of shapes. The ones that I most often use are these four in the picture about. A simple triangle, square, circle and alternative triangle. There’s also what I’d like to call a cone-shape: A mixture of a triangle and a circle, that has a pointed tip, but rounded edges.
Again, it is up to your imagination what kind of shapes you create. Keep in mind though that the more elaborate the shape of the tool is, the more rigid your base material needs to be.
Tube Cutting
So, you’ve bought your brass tube and it turns out it’s at least half a meter long. That’s not exactly a comfortable size to work with! So, how do you know what size to cut it down to? Of course, you could eyeball it. That works just fine. But for those of you who like a little more structure, I’ve got a trick that I use:

Make an L-sign with your thumb and index-finger and hold your brass tube next to your index finger. Let the bottom of the tube rest on the corner of where both fingers meet. If you measure a piece from that bottom of the tube up until the first knuckle of your index finger, that’s a long enough piece of tube to have your tool sit comfortable in your hand later on.
If your tool is fragile, sooner or later, one of the ends will break. To replace it, you’ll have to cut off the loop, AND the end of the tube where it was attached. If you’re like me and you prefer repairing old tools, instead of having to make new tools from scratch: Take the entire index finger as your measurement. The extra length will give you room to fix your tool a couple of times.
So, How Do I Make The Loop Or Scraper?
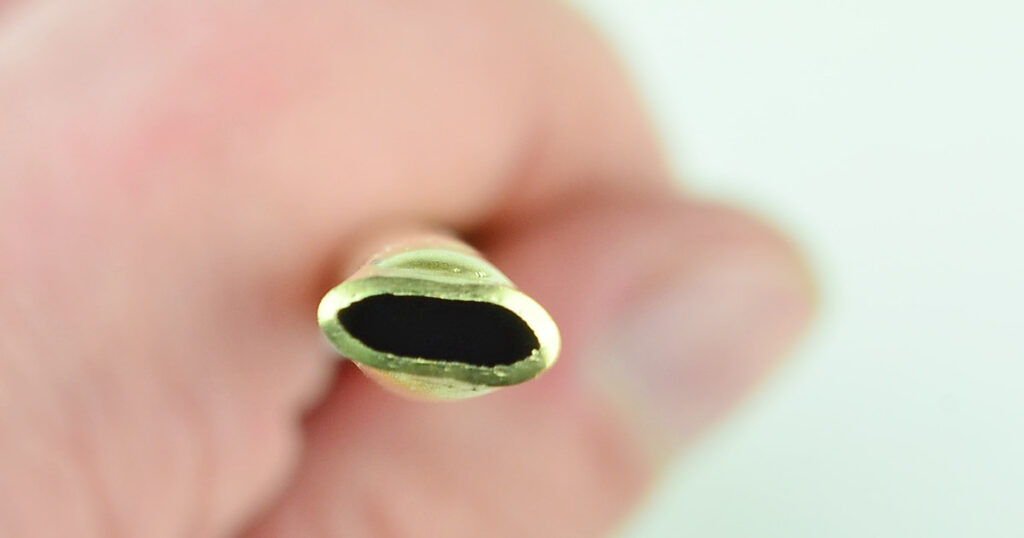
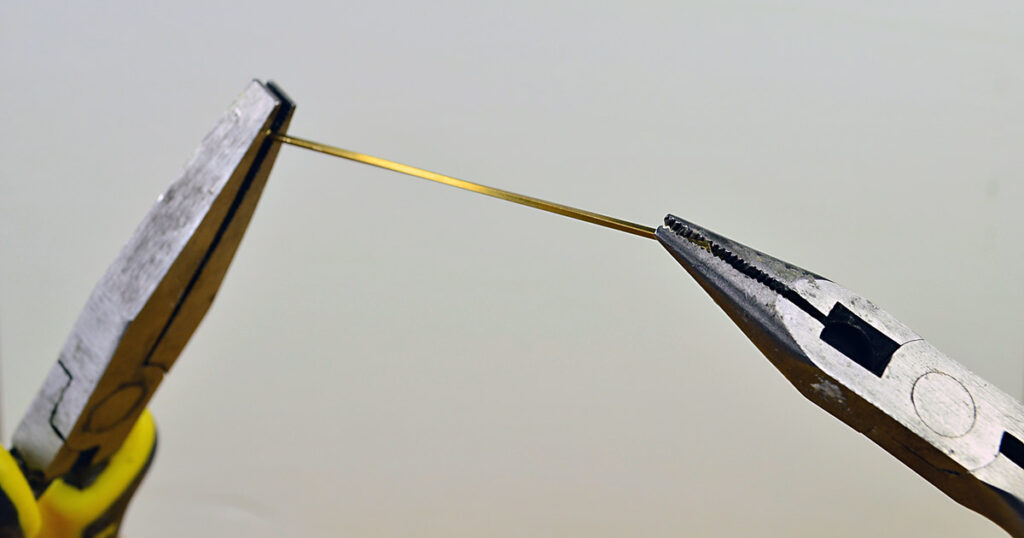
Now that you have created the handle, you’re going to prepare the ends of your tool. Take your flat nose plier, and squeeze the end of the tube until it is half-closed (see the picture). You want to see the maximum width the tube is going to have when it is entirely closed, but have enough space for the wire, the rod, the saw blade etcetera you use to create your tool to fit inside.
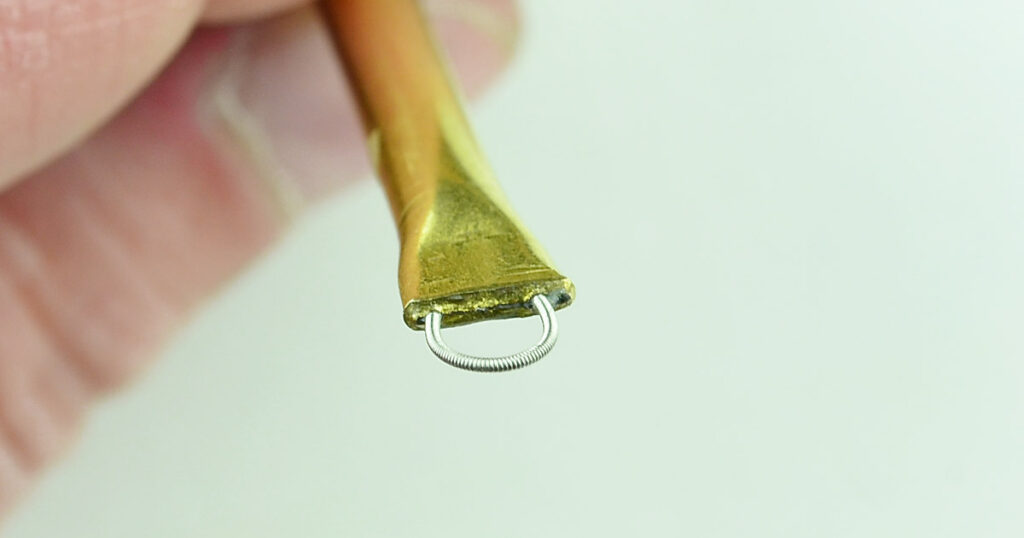
With either your hands, or a plier, turn a piece of your chosen material into the shape you prefer. Make sure that the shape is the same size as, or smaller than the width of the flattened end of the handle. Also keep in mind that it needs to be inserted into that handle and glued, so make sure that it has a length of at least 1 to 1,5cm on top of what you want your tool size to be. More is better in this case.
Next, fill the inside of the handle with glue. I use a small piece of utility wire and use it as a spoon. Next, add glue to the legs of the scraper or loop tool piece. Then, put 1 and 1 together, take out your flat nose plier again, and squeeze the end of the handle, until you’ve flattened it completely.
If the tool piece is a bit bulkier and the plier is unable to flatten the middle of the handle, it helps to flatten the middle of the tube from the front by using a round nose plier. They are small enough to avoid bending the newly inserted tool piece, if handled carefully.
Now do the same on the other end. Great combinations for tools are a scraper and a loop tool of the same shape. Scrapers/ loop tools of the same shape, but different sizes. Same size, different shapes. Totally random combinations.
Twists and Turns
By using coiled guitar strings, you already have an option for making custom scraper tools. but there are alternatives to get different textures. One I’ve already mentioned is using a square brass rod and twisting it. How does this work?
It’s quite simple. Take two flat nose pliers. Or a flat nose plier and a needle nose plier, like in the picture. You need some tools that are capable of gripping the rod tight. Because next, you’re going to twist the rod. Keep twisting, until the coils are the right density for you.
Unlike, regular wired coils, the coils you create with square rods still have that sharp corner edge, giving the tool a lovely texture.
I’m the first to admit that it takes a bit of getting used to getting the square rods to twist. Despite the teeth in the pliers, the rod still has a tendency of slipping of their grip and manually twisting and turning certainly takes a while. But luckily, we live in the Age of Machines!
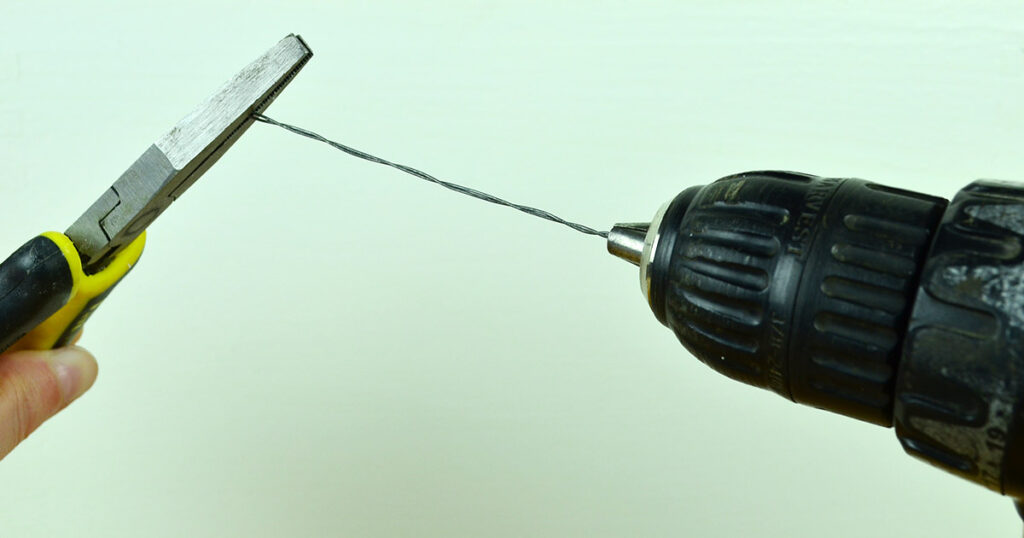
If you have access to a power drill, you can make life much easier for yourself by replacing one plier with it. Place your rod, or two pieces of wire, into the drill bit, like you would ordinarily a drill. The other side of the material is once again held by the flat nose plier. Now, simply – and slowly – press the trigger of the drill and let the machine do its work for you.
Endless Variety
When creating our own sculpting tools, nothing limits us, except our own imagination. If there is one area in your sculpture you can’t reach: Just make a tool for it. Always wanted to make a sculpture the size of a mountain? Make tools and start working.
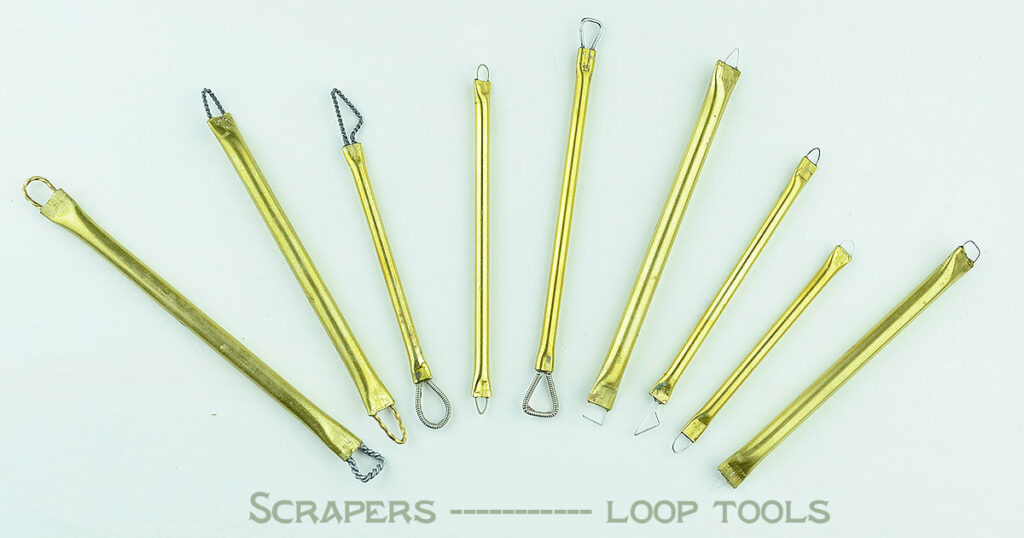
In this picture, the scrapers on the left are made with square rods, coiled utility wire, large guitar string. But the fourth from the left is also a scraper. Tiny, made from coiled violin string. Speaking of tiny: The two on the right are so small the camera can hardly pick them up. These are two of my accupuncture tools. And they are among my favorites.
Depending on your own needs, you can create tools that are the size of a house, or the size of a mouse.
Now, get busy and create your own!